I have always loved the idea of being able to go out into my garden and pick a zucchini for lunch or snag a tomato for our hamburgers. And when the produce really comes on, it’d be great to preserve what we have or freeze what we want to use later. Unfortunately we had to tear out our garden beds to put in a shed a few years ago so this year I’m building my own raised garden beds. I’ve built some at our old house and learned a lot plus I’ve been to the nursery and talked with my mom enough to feel like I’m on the right track to having a great vegetable garden this year. So, here’s a few tips and tricks if you want to put together your own raised garden beds.
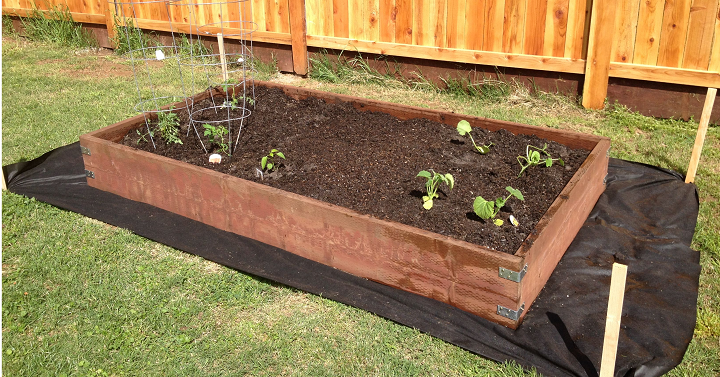
- Weed barrier – I HIGHLY recommend putting some type of weed barrier down, especially if you’re building your beds over grass. We went with a weed barrier I found on Amazon and have used in the past in our flower beds. It’s worked great there. You could also use cardboard boxes (all those Amazon boxes would work great). I put this down at our old house and they worked just as well and would break down over time.
- Make sure you build them high enough – this is especially important if you’re putting weed barrier down. I (and from the expert advice of the nursery workers) recommend not going any smaller than 8″ high. I went with the 10″ boards so that I have room to add dirty and other nutrients to the garden beds over the years.
- Wood – this is all a matter of opinion on what will work best for you. I wanted to try to make mine as cheap as possible so I looked as using wood fence posts which weren’t to pricey. The problem I was having was they wouldn’t last long and they’re super thin (which isn’t good once you add your dirt, they’ll start to bow). So, if you’re looking for a long time solution I recommend getting the good stuff from the get go. I went with treated lumber that was 10″ high and 10′ long (I was making 5’x5′ garden beds).
- Find the right dirt – this is where I stumbled and ended up with the wrong stuff (costing me more money than I wanted to spend). So make sure you do your research at your local nursery. Mine was awesome to work with but in doing research you’ll want to make sure you’re fill dirt has at least 1/3 blended compost, 1/3 peat moss and 1/3 coarse vermiculite. Luckily for me, my nursery had a great blend with these important ingredients in it.
- What to plant – this can depend on the area you live in. Around here, Utah, I’m able to put my lettuce and peas into the ground now (don’t forget your trellis) , they’re cold weather plants so they’ll do great. The rest of my veggie starts are inside and I plan on getting them into the garden beds around Mother’s Day. Make sure you also note how much room each plant needs. You can find this information on the back of the seed packet. I find square foot gardening to be the best way to use my space wisely. I just take string and some sticks to mark off each square foot that way I can see exactly where each plant needs to go.
I hope this gives you some ideas of what to think about when making your own garden beds and planting in them!
Don Kiser
You should use spellcheck and proofread better…ie dirty? nutrience?