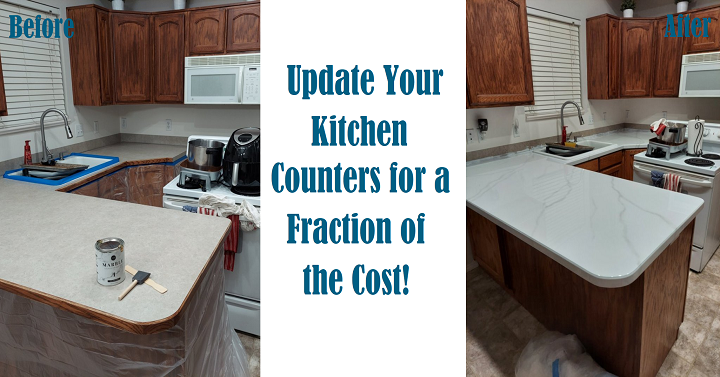
I have to say my kitchen isn’t that outdated but ever since we moved in I’ve wanted to give it a little face lift. So, I researched, looked around, found what I loved and did it myself for a fraction of the cost. And I’M IN LOVE! They turned out beautiful and I am so excited to share the process with you. It is easier than you might think.
First off let me tell you what I bought and went with. After lots of research and looking at different prices I went with this kit from Amazon. I was afraid the kit was going to be overpriced so I went looking for each individual item. In the end, the kit was a much better price, I got the exact amount I needed, and I am not spending money on extra supplies that are just going to end up sitting around until I decide to do it again. (Which we do not plan on moving so that is not happening in the near future.) One kit gave me just enough to do my counters in the kitchen (it covers 35 square feet of surface). It also comes with:
- White Primer
- Grey Veining Mineral
- White Highlight Mineral
- Epoxy Activator and Resin
- 6” Roller Arm
- 3 Roller Pads
- 2” Brush
- 4” Paint Sponge
- 2” Foam Brush
- Artist Brush
- Misting Bottle
- Practice Board
- 3 Wooden Stir Sticks
- Sandpaper
- Epoxy Gloves
- 9’x12’ Plastic Drop cloth (I ended up needing to buy more)
- And instructions
See, everything was included and the only things I bought extra of was the drop cloth just to be safe and cover every square inch which is important since you will be pouring the epoxy on the counter to give you that smooth finish.
Once you have bought the kit make sure you watch the instructional video they have on their site (you will find it in their instructions as well). This is IMPORTANT! I watched it multiple times to make sure I knew exactly what I needed to do when. Do not be intimidated, this project just takes more time than it does anything else because you need to make sure each layer cures fully before you start on the next layer. Also, keep little figures away. It’s so tempting to want to touch, especially after the epoxy is poured. Learn from my mistake and tape off the whole kitchen for at least the 3 days they recommend. I know that’s a long time but learn from my mistake. I’ll just say, I’ll have finger prints of my sweet littles in case anything happens to them…(anyone else a true crime addict 🙂 ).
Also, take their advice and draw out your design on paper first. This helped to make sure my veins were all headed in the same direction. I studied ideas and samples at the store before I even started. I pinpointed my favorites and copies those. The more you look at ideas and marble samples the more realistic your own will come out.
Other than that everything is pretty straight forward. They do a really good job at walking you through the steps and making it nearly fool proof. You got this, I believe in you!! (And don’t forget to share your before and after’s with us when you’re done!)